Open Modular Drone - TIRREX Project

Version 1.0.1

Site de ressource pour l'assemblage et l'utilisation des drones Tirrex

Flash AM32

AM32 Firmware

Original project : https://github.com/AlkaMotors/AM32-MultiRotor-ESC-firmware

Gipsa Fork :

https://github.com/gipsa-lab-uav/AM32-MultiRotor-ESC-firmware

https://github.com/gipsa-lab-uav/AM32_Arterytek

Tested hardware

Model mcu Bootloader Target
hglrc Trex STM32F051 PA2 HGLRC35
hglrc Zeus 4in1 STMF051 PA2 HGLRC35
mamba F40 4in1 AT32F421 PB4
aikon single AT32F421 PB4 AIKON_SINGLE
tekkon 32 mini AT32F415 ?!? Tekko32 f415

Flash Artery MCU with OpenOCD

  1. OpenOCD Artery fork in:

https://github.com/ArteryTek/openocd/releases

Take following file : “tool-openocd-at32-0.1100.220911.tar.gz”

  1. download AT32 IDE at following link : https://www.arterychip.com/file/download/1740
  2. install (for example) in ~/apps/AT32IDE/OpenOCD by following this link https://www.arterychip.com/en/news/220930_eng.jsp
  3. As root create and edit the file /etc/udev/rules.d/90_stlink.rules with

SUBSYSTEMS==“usb”, ATTRS{idVendor}==“0483”, MODE:=“0666”

  1. Change location to the installation folder of the OpenOCD (~/apps/AT32IDE/OpenOCD in previous example at line 2)

  2. add this script at32_utils.tcl to the “scripts” directory of the downloaded software

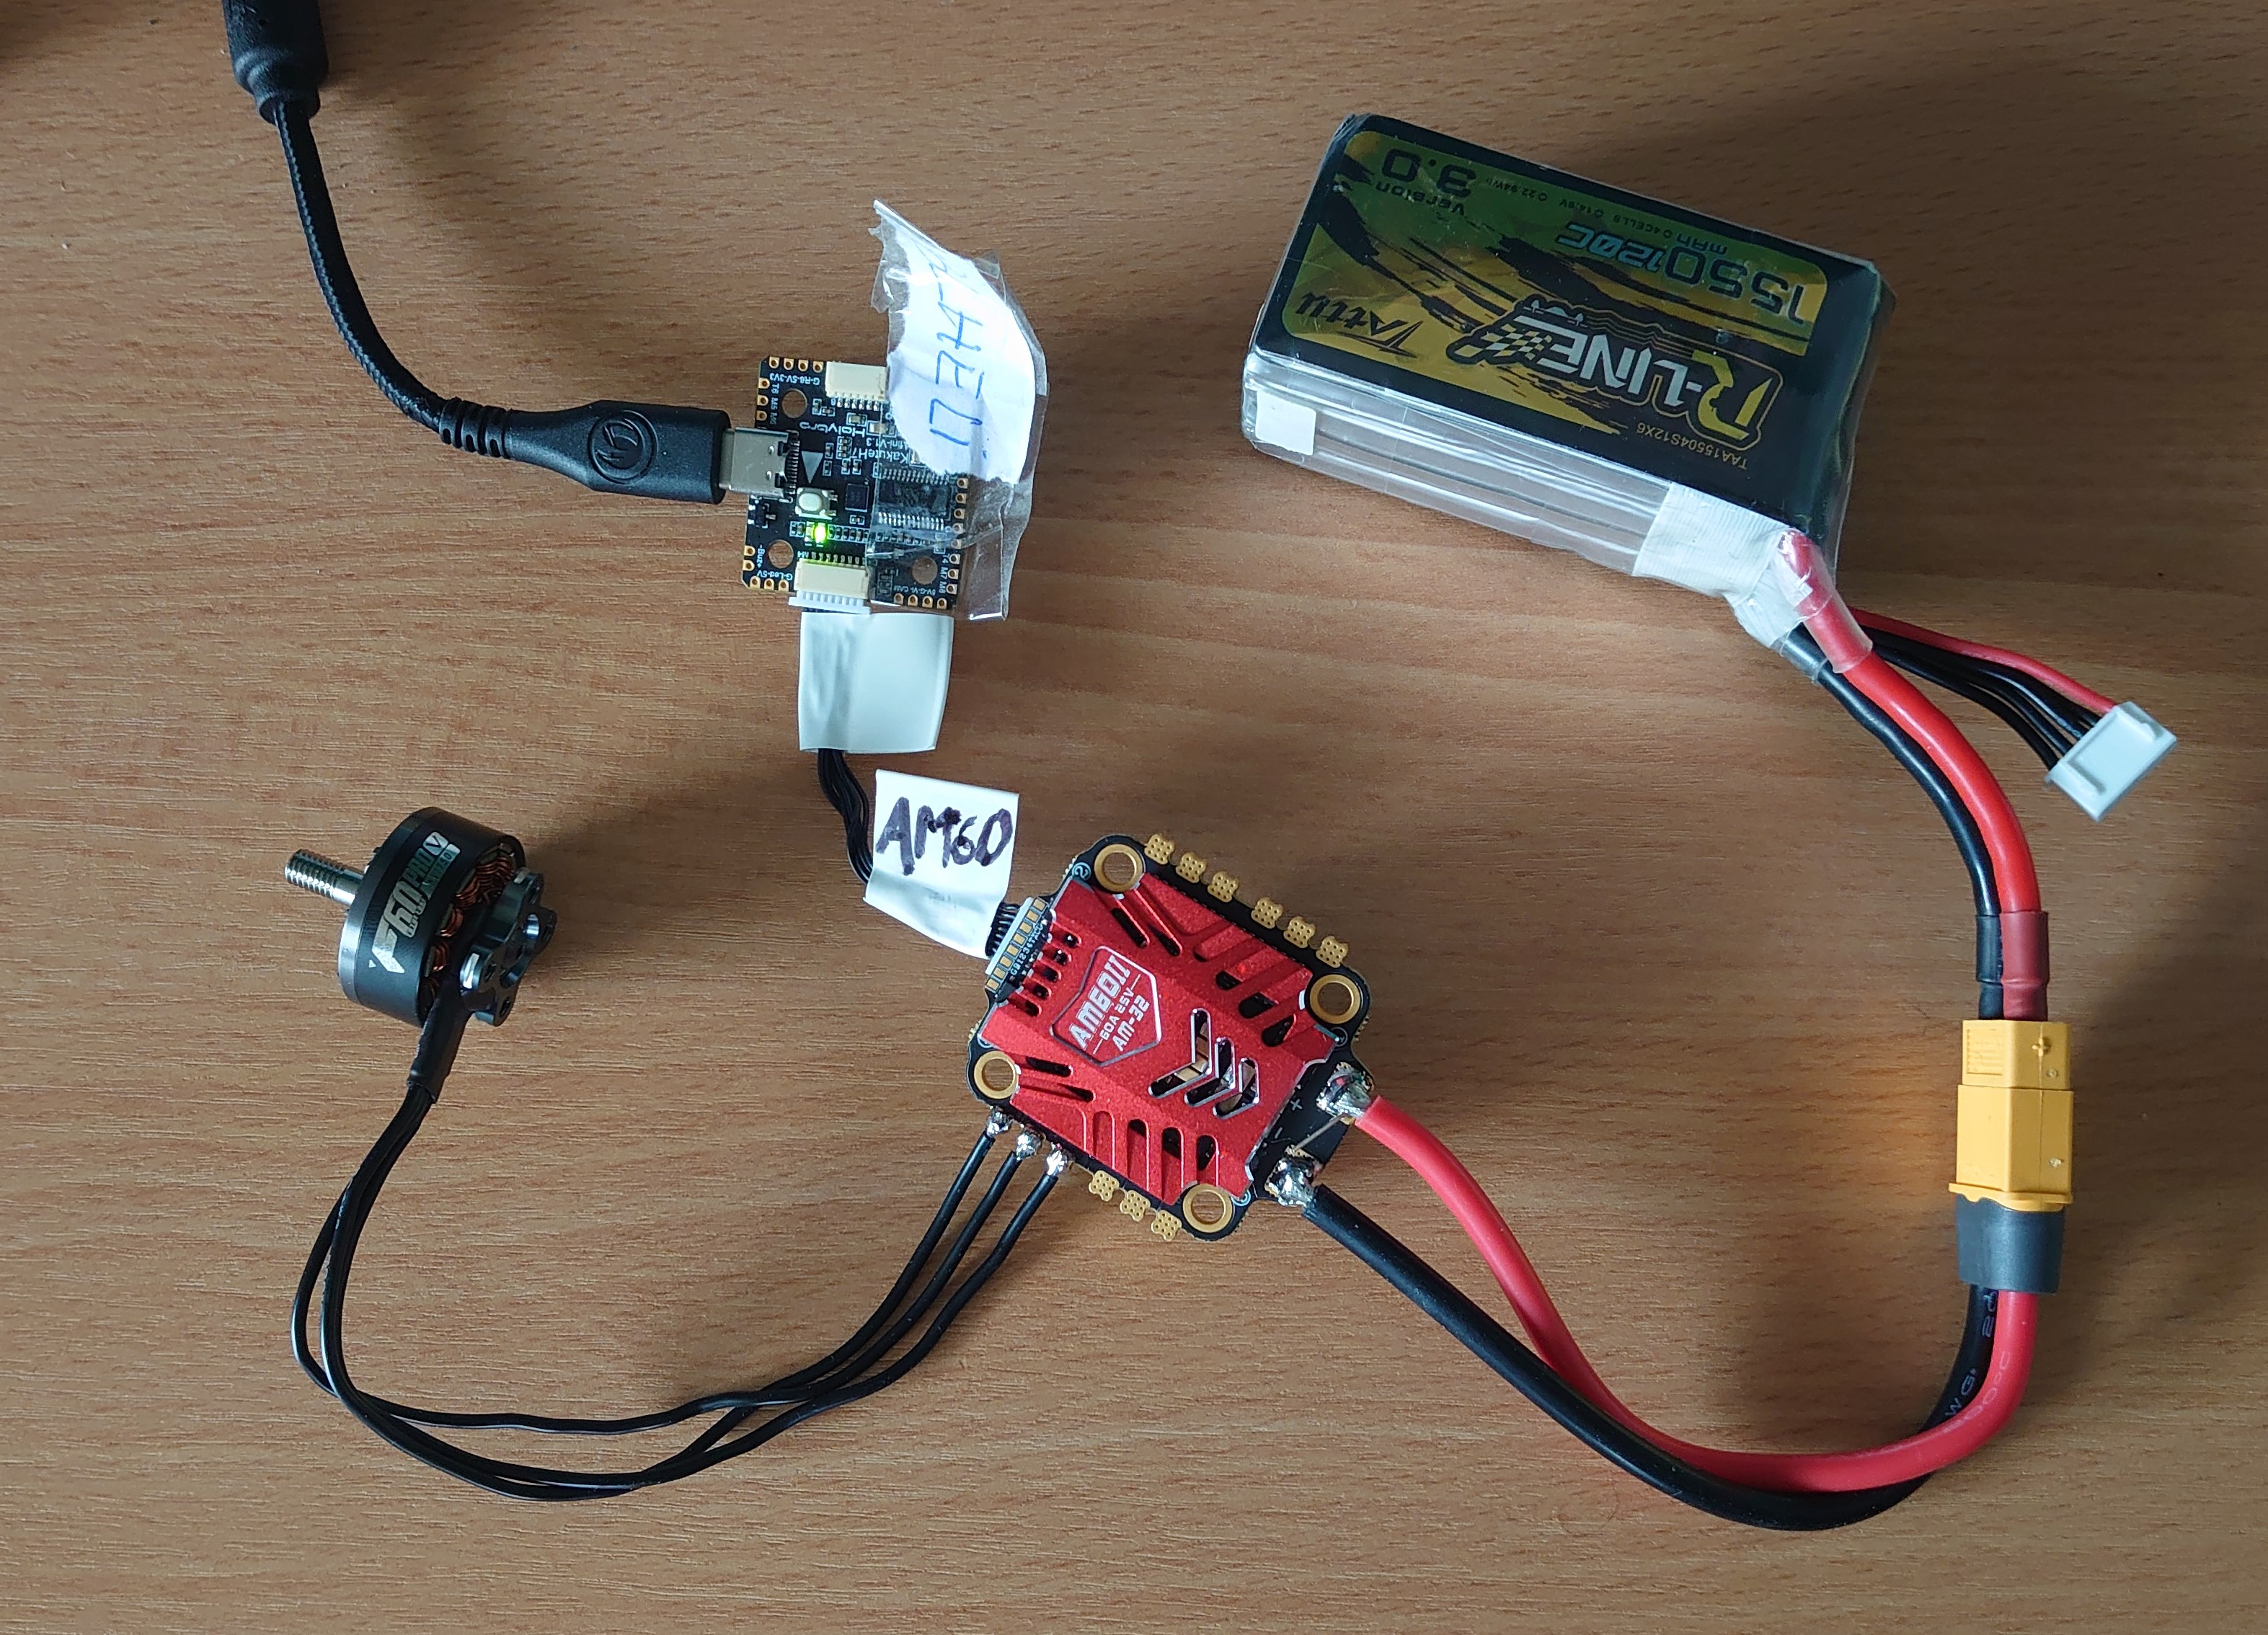
  3. Connect the esc to the stlink programmer and the power supply to the esc as follows :

    PHOTOOOOOO

  4. Run openocd :

    ./bin/openocd -s scripts -f ./interface/stlink.cfg -f ./target/at32f4**xx.cfg -f ./at32_utils.tcl

    with ** adjusted to the MCU you are using (15 or 21)

  5. in another terminal run telnet :

telnet localhost 4444

You can install it with

sudo apt install telnet

  1. in telnet : first disable write protection (if necessary) :

    reset halt

    at32f4**_disable_write_protection

    with ** adjusted to the MCU you are using (15 or 21)

    You may have to do it 2 times (the first time it is displaying an issue, but it is fake)

  2. download in ~/AM32_ESC/bootloaders the following “bootloader” file : https://am32.ca/downloads

    F4**_PB4_BOOTLOADER_V2.hex

    with ** adjusted to the MCU you are using (15 or 21) 9. flash the bootloader in the telnet console:

    flash write_image erase unlock /path_to_AT32F421_AM32_Bootloader/Objects/AM32_F415_BOOTLOADER_PB4_V4.hex

    reset halt

Flash Custom AM32 into the ESC with esc-unlocker

WhatsApp_Image_2024-10-25_at_10.45.10{width=298 height=167}

Download the bin from release :

https://github.com/am32-firmware/AM32-unlocker

https://github.com/am32-firmware/AM32-unlocker/releases

cd ~/src/esc-unlocker

./esc_unlicker_linux>

ST Link and ESC Tekko32 Mini Holybro :

Select file F415_PB4_BOOTLOADER_V4.hex

Flash Custom AM32 into the ESC

  1. Download following custom am32 firmware from here : AM32_TEKKO32_F415.hex
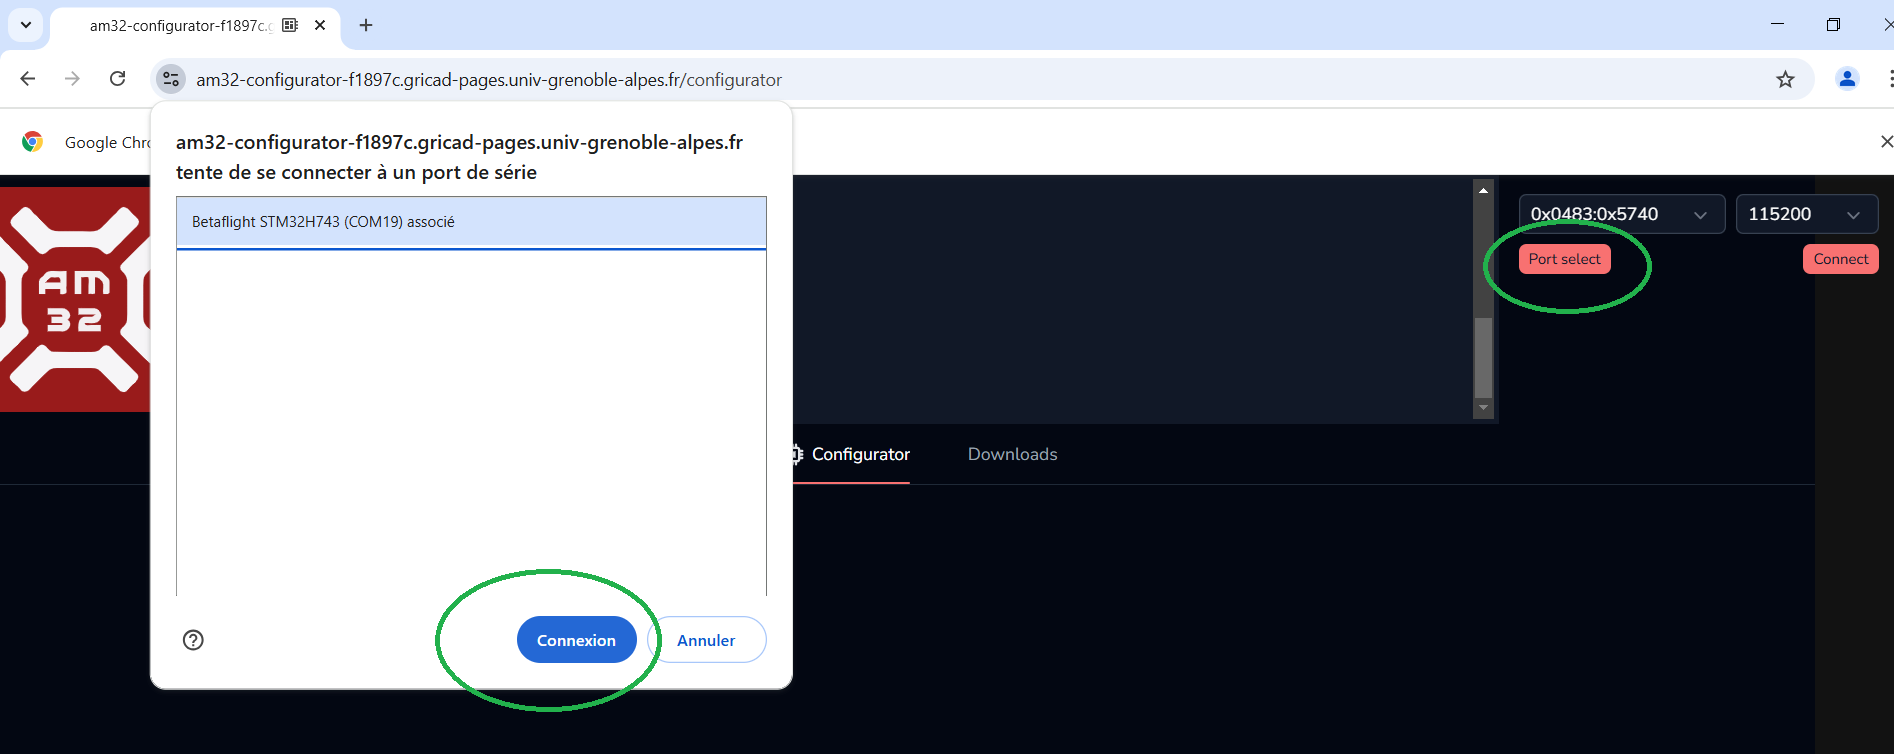
  2. Go to following link : https://am32.ca/configurator IN CHROME
  3. Plug in the kakute with BETA-FLIGHT, with the usb-c cable to the computer and the battery to the ESC
  4. click port select and select your device
  5. push the connect button
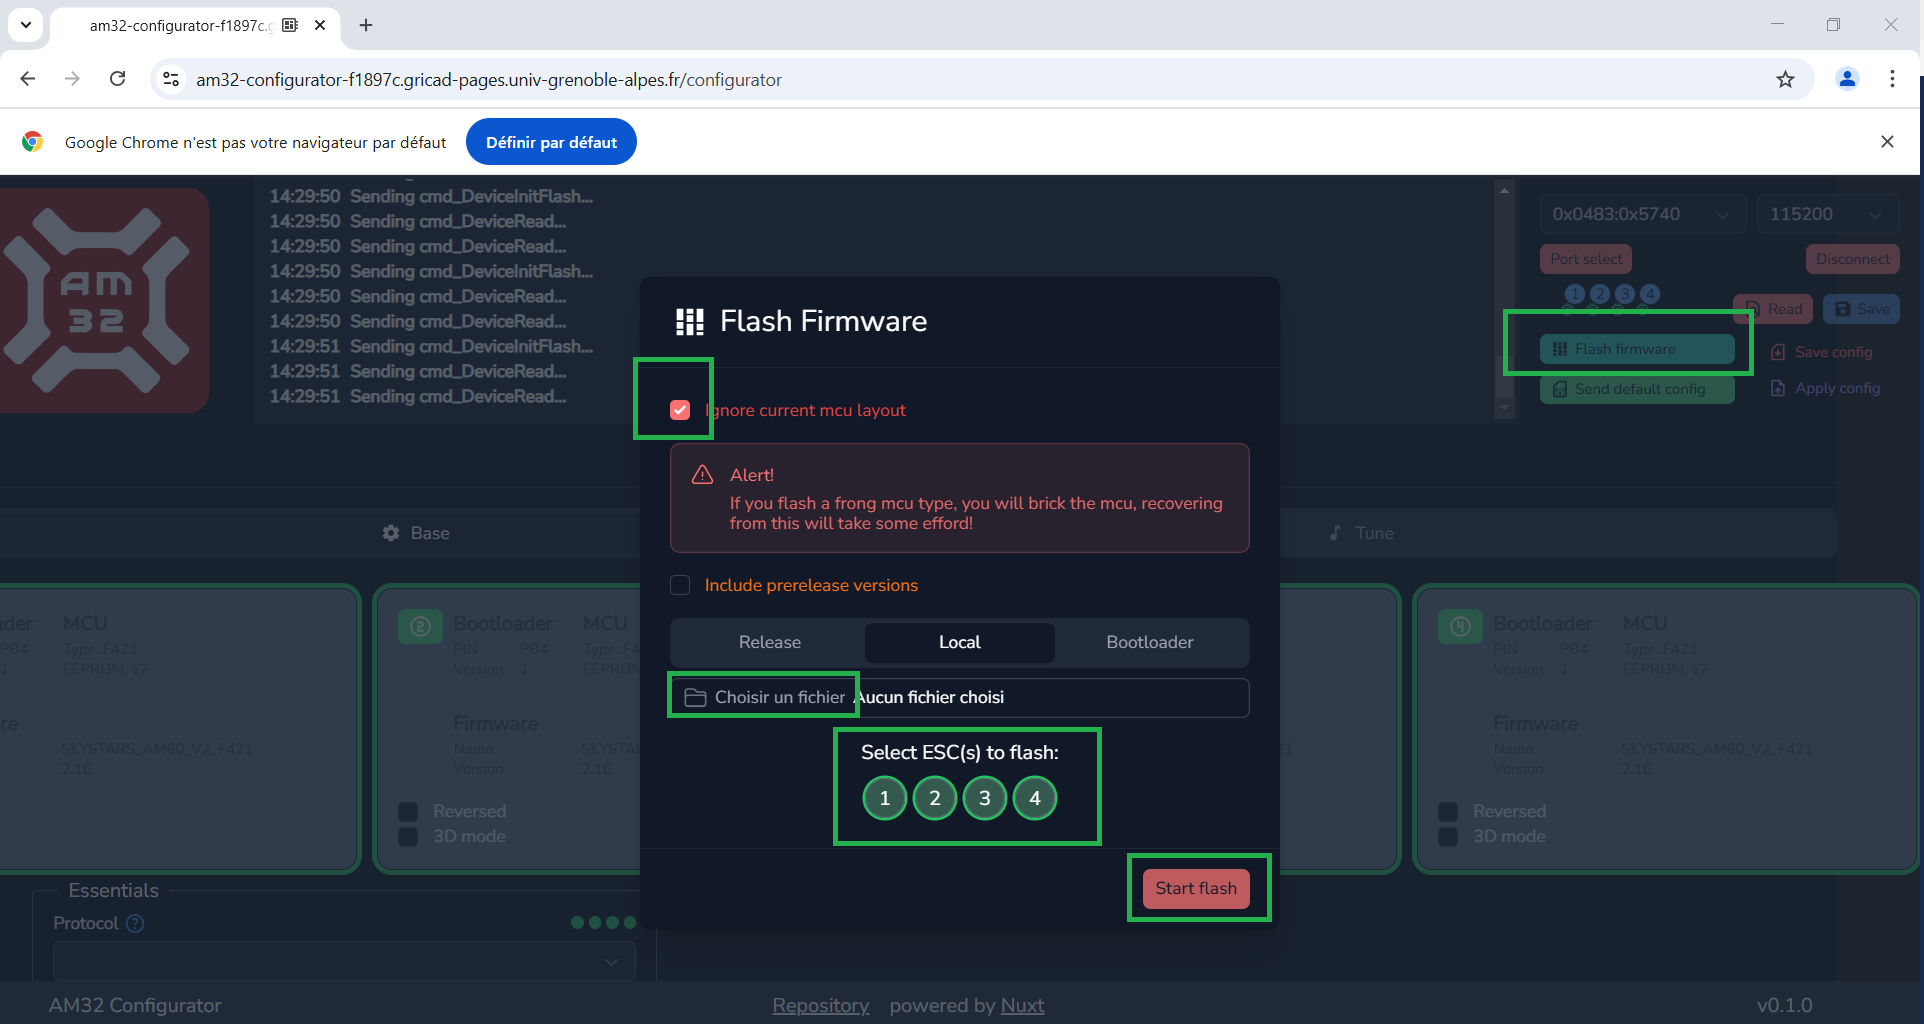
  6. push read button
  7. push flash firmware button
  8. tick “ignore current mcu layout”, select all 4 ESC and push the Flash local file button. Select “AM32_TEKKO32_F4**.hex

with ** adjusted to the MCU you are using (15 or 21)

Configure custom AM32

  1. Clone the following git repo : https://github.com/gipsa-lab-uav/esc-configurator

  2. Open a terminal

  3. Change location to the uncompressed file

  4. install yarn following this tutorial : https://github.com/gipsa-lab-uav/esc-configurator

  5. Enter following command into the terminal

    yarn start

  6. Chrome should open, click the connect button

  7. read settings, you should see 4 ESC

  8. Push “restore the default settings” button

  9. Tune the gains as you wish

Last updated on 6 Jan 2025
Published on 6 Jan 2025
 Edit on GitHub